


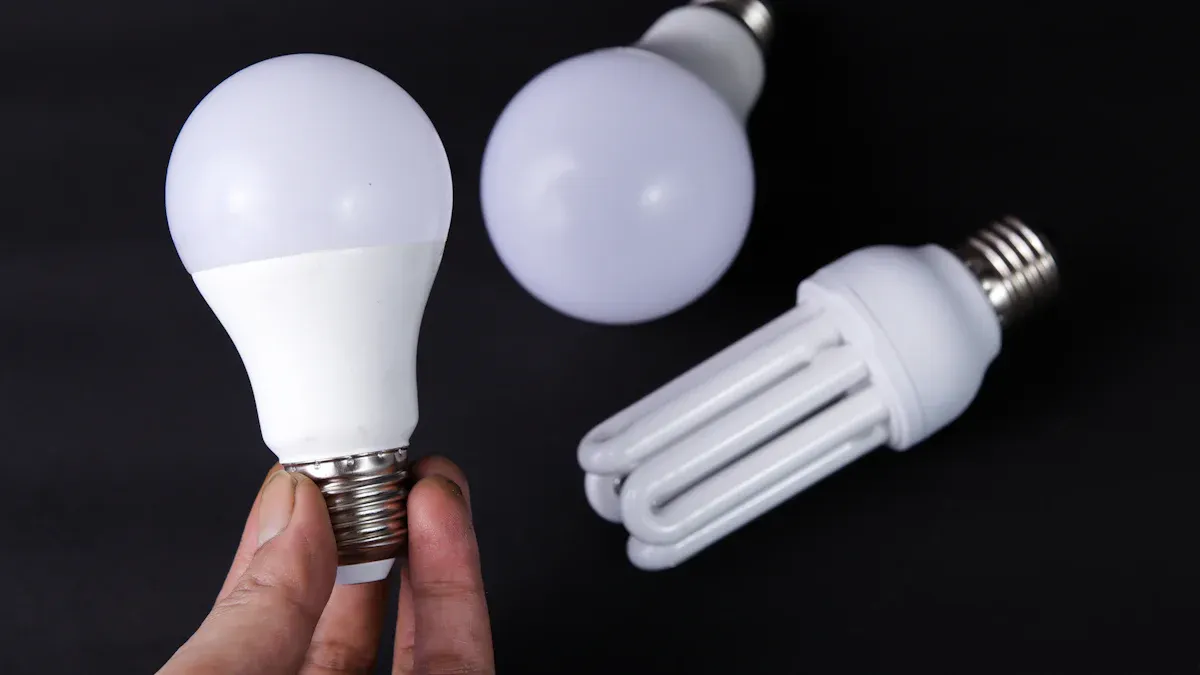
This guide details the process to replace fluorescent lights with modern led panel lights. A University of Michigan study shows LED lighting is up to 44% more efficient than older fluorescent tubes. Homeowners can see energy use drop by 50–75%, which reduces electricity costs. Choosing an LED Panel Light from a reputable LED Panel Light Manufacturer ensures quality. Top led light manufacturers design their led light fixtures for simple installation, making this a manageable project that upgrades a space with superior, efficient lighting.
Understanding Your Upgrade Options
Before beginning the project, homeowners must decide between two primary methods to upgrade to led lighting. The choice involves either a complete fixture replacement or a simpler tube retrofit. Each path offers distinct advantages and considerations.
Full Fixture Replacement: Fluorescent to LED Panel Lights
A full fixture replacement is a comprehensive approach. It involves removing the entire old fluorescent housing, including the case, ballast, and wiring. A brand-new, integrated LED panel light then takes its place.
Benefits of a Complete Fixture Swap
This method provides a completely new, modern lighting system. New led replacement fixtures guarantee compatibility between all components. They often feature a sleek, low-profile design that improves ceiling aesthetics. Users also gain access to the latest features, such as selectable color temperatures and advanced dimming capabilities, for a truly customized lighting environment.
When This Method is the Best Choice
A complete fixture swap is the ideal choice when the old fluorescent fixture is damaged, discolored, or outdated. It is also the best option for new construction or major renovations. While the installation is more involved than a simple tube swap, it eliminates old, inefficient components like the ballast, maximizing energy savings and long-term reliability.
Alternative: Retrofitting with LED Tubes
Retrofitting offers a quicker, more direct path. This process keeps the existing fixture housing in place. The installer only replaces the internal components, such as the fluorescent tubes and potentially the ballast.
Ballast-Bypass vs. Direct-Fit (Plug-and-Play) Tubes
Installers have two main retrofit tube options: Type A and Type B. Type A, or "Direct-Fit," tubes are the simplest solution. They work with the existing fluorescent ballast, making installation a straightforward swap. Type B, or "Ballast-Bypass," tubes require removing the ballast and rewiring the fixture to connect the sockets directly to line voltage.
Feature | Ballast-Bypass (Type B) | Direct-Fit (Type A) |
|---|---|---|
Installation | Requires rewiring; more complex | Simple plug-and-play; no rewiring |
Efficiency | Higher; eliminates ballast energy draw | Lower; ballast still consumes power |
Maintenance | No ballast to maintain or replace | Ballast remains a point of failure |
Initial Cost | Higher labor costs | Minimal labor costs |
Safety | Higher risk during installation | Safer; no electrical modification |
Pros and Cons of Tube Replacement
Retrofitting is often faster and more economical, especially when using Type A tubes. The process can take as little as 10-15 minutes per fixture. However, this method has drawbacks.
⚠️ Safety and Compatibility Warning Bypassing a ballast (Type B) introduces significant safety risks. The sockets will carry live 120V power, increasing the danger of electric shock during installation. There is no industry-standard wiring schematic, which adds complexity. A professional electrician should handle this type of retrofit to ensure safety and proper execution.
Additionally, if the old fixture housing is in poor condition, a retrofit will not improve its appearance. Retaining the old ballast with Type A tubes means it can still fail, requiring future maintenance.
Essential Preparation and Safety First
Proper preparation is the foundation of a successful and safe installation. Homeowners should gather all necessary tools and materials before starting. This ensures the project proceeds smoothly without interruption. Safety remains the top priority throughout the entire process.
Gathering Your Tools and Materials
A well-organized workspace begins with having the right equipment on hand. This project requires a combination of safety gear, specialized electrical tools, and common household items.
Essential Safety Gear: Gloves and Safety Glasses
Protecting oneself from potential hazards is non-negotiable.
Safety Glasses: Shield eyes from dust, debris, and accidental wire pokes.
Work Gloves: Protect hands from sharp edges on the old fixture housing.
Electrical Tools: Voltage Tester, Wire Strippers, Pliers
These tools are critical for handling the electrical components safely and effectively.
Voltage Tester: A non-contact voltage tester is essential for verifying that power is off.
Wire Strippers: Used to remove insulation from wires for a clean connection.
Needle-Nose Pliers: Help bend and position wires inside the junction box.
General Tools: Ladder, Screwdriver Set, Drill
These items assist with the physical removal and installation of the fixtures.
Ladder or Step Stool: Provides safe, stable access to the ceiling.
Screwdriver Set: A Phillips and a flathead screwdriver will handle most fixture screws.
Drill (Optional): Can speed up the removal of old screws.
Required Materials: The LED Panel Kit, Wire Nuts
The core components for the upgrade include the new fixture and connectors.
LED Panel Light Kit: This includes the panel, the driver, and mounting hardware.
Wire Nuts: Used to create secure connections between the fixture and supply wires.
Choosing the Perfect LED Panel Light
Selecting the right fixture involves more than just aesthetics. Homeowners must consider size, light color, and functionality to match the room's needs.
Measuring for the Correct Panel Size (2x2 vs. 2x4)
Most fluorescent troffers come in standard sizes. An installer should measure the existing fixture to ensure the new panel is a perfect fit. The most common sizes for drop ceilings are 2x2 feet and 2x4 feet.
Selecting Color Temperature (CCT): Warm vs. Cool Light
Correlated Color Temperature (CCT) determines the color of the light, measured in Kelvin (K). Different environments benefit from different light tones. Neutral or cool lighting enhances alertness and is ideal for task-oriented spaces.
Environment | Recommended CCT (K) | Rationale |
|---|---|---|
Offices / Workshops | 3500–5000 K | Neutral to cool light improves focus and clarity. |
Kitchens / Labs | 4000–5000+ K | Enhances visibility, accuracy, and safety. |
General Living Areas | 3000–3500 K | Provides a neutral, comfortable white light. |
Deciding on Dimmable vs. Non-Dimmable Panels
Many led panel lights offer dimming capabilities for adjustable brightness. If a homeowner desires this feature, they must purchase a dimmable panel and a compatible dimmer switch.
⚠️ Dimmer Switch Compatibility is Crucial Standard dimmer switches are not designed for LED electronics. Using an incompatible dimmer will cause flickering, buzzing, or failure to dim. Installers must use a dimmer switch specifically rated for LED fixtures to ensure smooth performance.
The Critical Safety Step: Turning Off Power
Before touching any wires, an installer must completely disconnect power to the circuit. This is the single most important step for preventing electric shock.
How to Locate Your Home's Circuit Breaker Box
The circuit breaker box, or electrical panel, is usually found in a utility area. Common locations include the garage, basement, a closet, or a hallway.
Identifying and Switching Off the Correct Breaker
Inside the panel, breakers should have labels corresponding to different rooms or areas. The installer should find the breaker for the room with the light fixture. To turn it off, they must flip the switch to the "OFF" position. The handle will be in the down or center position, and its main contacts will be open.
How to Confirm the Power is Off with a Voltage Tester
After flipping the breaker, an installer must confirm the fixture has no power.
First, test the voltage tester on a known live outlet to ensure it works.
Next, at the light fixture, hold the tip of the non-contact tester near each wire.
The tester should not light up or beep. This confirms it is safe to proceed.
Step-by-Step: How to Replace Fluorescent Lights
With the power off and tools ready, the installer can begin the physical process to replace fluorescent lights. This phase involves carefully dismantling the old unit before preparing the space for the new LED panel.
Removing the Old Fixture Cover and Tubes
The first step is to gain access to the fixture's internal components. This requires removing the lens and the fluorescent tubes.
How to Open or Remove the Plastic Diffuser Lens
Fluorescent fixtures use various cover types. An installer must identify the specific type to remove it without causing damage. Most covers are held by simple clips, screws, or pressure. The table below outlines common cover types and their removal methods.
Cover Type | Description | Removal Method |
|---|---|---|
Acrylic Diffuser | A flat or curved plastic panel common in kitchens. | 1. Locate Clips: Find the small tabs or clips along the fixture's edge. 2. Press or Squeeze: Gently press spring-loaded tabs inward or squeeze lever-style clips. 3. Lower the Cover: The cover will swing down or can be lowered by hand. |
Wraparound Cover | A cover that wraps around the fixture's sides. | 1. Identify Latches: Look for latches on the sides or ends. 2. Release Latches: Push up, squeeze, or unclip the latches to detach the cover. 3. Lower and Remove: Carefully lower the cover once all latches are released. |
Parabolic Louver | A grid-like cover designed to reduce glare. | 1. Release Clips: Unlatch the clips on one side. 2. Swing Down: The cover will swing down on its hinges. 3. Lift Off Hinges: Some louvers can be lifted off the hinges for complete removal. |
Egg Crate Louver | A lightweight, open-grid cover for drop ceilings. | 1. Push Up: Gently push the cover upward into the ceiling space. 2. Tilt and Angle: Tilt the cover to maneuver it out of the grid opening. 3. Lower Carefully: Slowly lower the cover through the opening. |
The Twist-and-Pull Method for Removing Fluorescent Tubes
Once the cover is off, the fluorescent tubes are exposed. An installer can remove them with a simple technique.
Grasp one end of a fluorescent tube.
Rotate the tube 90 degrees (a quarter turn) in either direction. The prongs on the end will align with the slot in the socket.
The tube will release from the socket. Gently pull it straight down and out of the fixture.
Repeat this process for all remaining tubes.
Accessing and Disconnecting the Ballast Wiring
The ballast is the heavy, box-like component that regulates power to the fluorescent tubes. An installer must disconnect it from the building's main power supply.
How to Open the Ballast Compartment Cover
The ballast and its wiring are typically housed behind a metal cover in the center of the fixture. An installer can usually open this compartment by removing a few screws or squeezing metal tabs. The cover will then either hinge open or come off completely, revealing the ballast and a junction of wires.
Identifying the Hot, Neutral, and Ground Wires
Inside the compartment, the installer will find the wires from the ceiling connecting to the fixture's wires. Standard color coding helps identify each wire's function:
Hot Wire: Usually black. This wire carries the electrical current from the power source.
Neutral Wire: Usually white. This wire completes the electrical circuit.
Ground Wire: Usually green or bare copper. This is a safety wire that protects against electric shock.
Using Your Voltage Tester a Final Time for Safety
This step is a final, critical safety check before touching any wires.
⚠️ Confirm Zero Power An installer must touch the tip of the non-contact voltage tester to each wire (black, white, and ground) coming from the ceiling. The tester must not light up or make any sound. This action confirms that the circuit is de-energized and safe to handle.
How to Remove Wire Nuts and Separate the Wires
The building's supply wires are connected to the fixture's wires with small plastic caps called wire nuts. To disconnect them, an installer should grip a wire nut and twist it counterclockwise. After a few turns, the wire nut will come off, and the wires can be gently pulled apart. This should be done for the hot, neutral, and ground connections. The old fixture is now electrically disconnected from the ceiling.
Detaching the Old Fixture Housing
With the wiring disconnected, the final removal step is to detach the entire metal housing from the ceiling. The method depends on whether the fixture is in a drop ceiling or mounted to a solid surface.
For Drop Ceilings: Lifting the Fixture Out of the Grid
Troffer fixtures in drop ceilings are the easiest to remove. The process to replace fluorescent lights in this scenario is straightforward.
Push the Fixture Up: An installer should push the entire fixture housing upward, clearing one edge of the ceiling grid.
Tilt and Angle: The fixture can then be tilted at an angle.
Lower Through the Opening: The installer carefully maneuvers the angled fixture down through the grid opening. It is important to be mindful of any safety wires tethering the fixture to the ceiling structure.
Disconnect Safety Wires: If present, these tethers must be unclipped or unscrewed before the fixture can be fully removed.
For Surface-Mounted Fixtures: Unscrewing from the Ceiling
Fixtures mounted directly to a drywall or plaster ceiling are held in place by screws or bolts. An installer must support the fixture's weight with one hand while using a screwdriver or drill to remove the mounting screws. Having a helper for this step is highly recommended, as the fixture can be heavy and awkward to handle alone. Once all screws are out, the fixture can be lowered.
Dealing with Old Screws and Brackets
Older installations may present challenges. Screws might be stripped, rusted, or painted over. An installer can use a screw extractor for stripped heads or carefully score paint around the screw before attempting removal. Some fixtures may have hidden brackets that need to be located and released. Patience and the right tools are key to overcoming these minor obstacles. The goal is to fully remove the ballast and the old housing.
How to Install the New LED Light Fixture
With the old hardware removed, the ceiling is now ready for the upgrade. This section provides the complete instructions to install the new led light fixture, from initial preparation to final placement. The process involves preparing the panel, wiring the driver, and mounting the unit securely.
Preparing the New LED Panel for Installation
Proper preparation of the new panel ensures a smooth and efficient installation process. An installer should complete these steps on the ground before lifting the panel to the ceiling.
Unboxing and Inspecting Your New LED Panel
First, an installer carefully unboxes the new led light fixture and all its components. They should inspect the panel for any signs of shipping damage, such as cracks in the frame or lens. It is also important to verify that all necessary parts are included in the kit, such as the LED driver, mounting clips, and any provided hardware.
Attaching the LED Driver to the Panel's Backside
The LED driver is the power supply for the panel. Most kits are designed for the driver to rest on the back of the panel. The installer connects the driver's low-voltage output cable to the corresponding port on the panel. This connection usually clicks securely into place. The driver itself can then be placed in its designated spot on the panel's rear surface.
Installing Pre-Mounting Clips and Safety Wires
LED panels for drop ceilings include integrated mounting clips or tabs. An installer should bend these four clips upward, perpendicular to the panel's back. This prepares them to be bent back down over the ceiling grid later. Additionally, they should attach the included safety wires to the designated anchor points on the panel's frame. These wires will later secure the fixture to the building's structure, preventing it from falling.
Wiring the New LED Driver
With the panel prepared, the next critical phase is wiring the LED driver to the building's power supply. This must be done with precision to ensure safety and proper function.
Understanding the Wires on the LED Driver
The LED driver has two sets of wires. The output wire is already connected to the panel. The input wires, which connect to the building's power, are typically color-coded:
Black Wire: The "Live" or "Hot" connection (L).
White Wire: The "Neutral" connection (N).
Green Wire: The "Ground" connection.
Connecting Wires: Black-to-Black, White-to-White
The installer connects the driver's input wires to the corresponding supply wires coming from the ceiling.
Locate the driver's input wires, marked 'L' (Live/Black) and 'N' (Neutral/White).
Use wire strippers to ensure about 1/2 to 5/8 inch of bare copper is exposed on the ceiling supply wires.
Connect the black wire from the ceiling to the black wire on the LED driver.
Connect the white wire from the ceiling to the white wire on the LED driver.
Connecting the Ground Wire for Safety
The ground wire is a crucial safety feature. The installer must connect the green or bare copper ground wire from the ceiling to the green ground wire on the LED driver. This connection protects against electrical faults.
Securing All Connections Firmly with New Wire Nuts
Using new wire nuts from the kit ensures a reliable connection. An installer must follow a precise method to create a secure bond.
Select the Right Size: They choose a wire nut rated for the number and size of the wires being joined.
Align the Wires: The installer holds the stripped ends of the two wires together, ensuring the ends are perfectly aligned.
Twist the Nut: They place the wire nut over the wire ends and twist it clockwise. They continue twisting until the nut is tight and the wires are firmly bound together.
Professional Tip: After tightening, an installer should gently tug on each individual wire. A secure connection will show no movement. If a wire pulls out, they must remove the nut and repeat the connection process.
Mounting the New LED Panel Light
With the wiring complete, the final step is to lift the panel into place. This requires careful maneuvering to seat the panel correctly and secure it.
Lifting the Panel into the Ceiling Opening
The installer first tucks the connected wires and the LED driver into the ceiling cavity. They then lift the panel and angle it to pass through the opening in the ceiling grid, just as the old fixture was removed.
How to Set the Panel Securely in a Drop Ceiling Grid
Once the panel is above the grid, the installer carefully lowers it. The edges of the panel should rest flat and evenly on the inner lip of the T-bar grid on all four sides. The panel should sit flush with the surrounding ceiling tiles.
Bending the Mounting Tabs for a Flush Fit
For a secure fit, the installer reaches above the panel and bends the four pre-installed mounting tabs down over the T-bar grid. This action locks the panel in place and prevents it from shifting or being accidentally pushed up.
Attaching Safety Tethers to the Ceiling Structure
This is a non-negotiable safety step. The installer secures the other end of the safety wires to a permanent part of the ceiling structure, such as a support beam, truss, or the grid itself. This ensures the fixture will not fall in the event of an earthquake or accidental dislodging.
Organizing Wires for a Clean Fit
As a final check, the installer ensures all wiring is neatly organized in the ceiling space above the panel. No wires should be pinched between the panel and the ceiling grid, as this could damage the insulation and create a hazard.
Finalizing the Installation and Testing
The installation is nearly complete. The final phase involves safely restoring power, testing the new fixture, and responsibly disposing of the old components. An installer must follow these concluding steps with the same care as the installation itself.
Safely Restoring Power to the Circuit
Restoring electricity requires a methodical and safe approach. An installer should never rush this critical step.
Returning to the Circuit Breaker Box
An installer returns to the home's electrical panel. Before touching any breakers, they should ensure all tools are put away. They must also confirm that all wire nuts are tight and no bare wires are exposed in the work area. It is a good practice to alert others in the house that power is about to be restored.
How to Firmly Flip the Breaker Back to the 'On' Position
Restoring power is more than just flipping a switch. An installer follows a specific safety protocol.
Stand to the side of the breaker box, not directly in front of it.
Use only one hand to operate the breaker.
Move the breaker switch firmly and smoothly from the "OFF" to the "ON" position.
Safety Alert: Immediate Tripping If the breaker trips again right away, it signals a serious problem like a short circuit. The installer must not try to force it back on. The wiring must be re-inspected, or a licensed electrician should be consulted.
Testing Your New LED Panel Light
With the power safely restored, the moment of truth arrives. This is the time to verify the installation was successful.
Flipping the Wall Switch to Check Your Work
The installer proceeds to the wall switch that controls the new fixture. They flip the switch to the "ON" position. A successful installation results in the LED panel turning on immediately. The light should be bright and steady, with no flickering or buzzing sounds. If the light flickers, the installer may need to re-check for loose wiring or verify dimmer switch compatibility.
Admiring the New, Improved Lighting
A working panel is a rewarding sight. The installer can now appreciate the significant upgrade. The new LED light provides superior brightness, better color clarity, and a modern, clean look compared to the old fluorescent fixture.
Cleanup and Responsible Disposal
The final task is to clean the work area and properly dispose of the old fixture. Fluorescent lights contain hazardous materials, so they cannot be thrown in the regular trash.
How to Safely Dispose of Old Fluorescent Tubes
Old fluorescent tubes contain mercury, a toxic substance. Many states, including California, Massachusetts, and Vermont, legally prohibit discarding these lamps in landfills. An installer has several options for responsible disposal:
Local Waste Agencies: Many municipalities have household hazardous waste (HHW) collection sites or events. An installer can check their local government's website for details.
Retailer Take-Back Programs: Large hardware stores like Home Depot and Lowe's often offer free in-store recycling for fluorescent tubes.
Mail-Back Services: Companies provide pre-labeled recycling kits. An installer can find these services through resources like Earth911.com.
Recycling the Old Metal Fixture and Ballast
The metal housing and the old electronic ballast should also be recycled. The metal can be taken to a local scrap metal yard. The ballast, which may contain PCBs in older models, requires special handling. Professional recycling services like Cleanlites or NLR offer programs, including mail-back options, to properly dispose of old ballasts and other lighting components.
Troubleshooting Common Installation Issues
Even with careful installation, an installer may encounter issues. Most problems are simple to diagnose and fix. A systematic approach helps identify the root cause quickly, whether the light fails to turn on or exhibits flickering.
What to Do If the Light Doesn't Turn On
If the new panel does not illuminate, an installer should start with the most basic potential issues before re-examining the wiring. This logical process saves time and prevents unnecessary work.
Checking Your Breaker and Switch
The first step is to confirm the power source. An installer should perform these simple checks:
Return to the circuit breaker box. Confirm the correct breaker is firmly in the "ON" position.
Verify the wall switch controlling the fixture is also switched on.
If the light is plugged into a switched outlet, test the outlet with another device to ensure it is live.
Re-examining Your Wire Connections
If power is confirmed, the issue likely lies with the wiring. The installer must turn the power off again at the breaker before proceeding. They should then re-examine each connection. A secure connection is essential for proper function. The installer gently tugs on each wire at the wire nut. A loose wire will pull free, indicating the connection must be redone.
Ensuring the LED Driver is Properly Connected
The LED driver is a critical component. A problem here can prevent the panel from lighting up.
Input Side: The installer verifies the building's supply wires (black, white, ground) are securely connected to the driver's input wires.
Output Side: They check that the driver's low-voltage output cable is fully clicked into the port on the panel itself. If all connections are secure and the panel still does not work, the installer can test the panel by connecting it directly to a known-good power supply. If it works, the original driver is likely faulty and needs replacement.
How to Fix a Flickering LED Panel
Flickering is a disruptive issue often caused by incompatible components or unstable power flow. It is a sign that part of the system is not working correctly.
Checking for Loose Wiring
Just as loose wiring can prevent a light from turning on, it can also cause flickering. An intermittent connection disrupts the steady current that LEDs require, resulting in an unstable light output. The installer should re-confirm that all wire nut connections are tight and secure.
Verifying Dimmer Switch Compatibility
A common cause of flickering is an incompatible dimmer switch. Standard dimmers designed for high-wattage incandescent bulbs cannot properly regulate the low power draw of LEDs.
Compatibility Alert: Use an LED-Rated Dimmer An installer must ensure the dimmer switch is specifically rated for LED use. Using an older, non-compatible dimmer will almost certainly cause flickering, buzzing, or premature failure of the led light fixture.
To confirm compatibility, the installer should consult the panel manufacturer's documentation. Most provide a "Compatibility Sheet" or "Spec Sheet" that lists approved dimmer models by part number.
An installer's successful project to replace fluorescent lights marks a significant home improvement. This upgrade to led provides immediate and long-term advantages. The installer has now mastered the essential steps, from safely disconnecting power to correctly wiring the new led light fixture. This new led light fixture enhances the space with superior illumination. The project boosts the home's energy efficiency and delivers a lighting solution with a much longer lifespan. An installer can now enjoy the rewards of their work every time they flip the switch.
FAQ
How much energy will I save?
An installer can expect significant savings. The amount of energy you will save depends on usage, but most people see a 50–75% reduction in lighting-related electricity costs. This upgrade offers a substantial return on investment through lower utility bills.
Do LED panels last longer than fluorescent tubes?
Yes, significantly longer. An LED panel light has a typical lifespan of 50,000 hours or more. A standard fluorescent tube, in contrast, generally lasts only 10,000 to 20,000 hours. This longevity greatly reduces maintenance frequency and replacement costs over time.
When should an installer hire a professional electrician?
An installer should always hire a licensed electrician for tasks beyond their expertise.
A professional is essential if the home has old aluminum wiring, if the breaker repeatedly trips, or if the installer is uncomfortable with any step of the wiring process. Safety is the top priority.
Can an installer change the light color after installation?
Some advanced LED panels offer this feature. An installer can purchase a CCT-selectable panel. These fixtures have a switch on the driver or panel that allows the user to choose between different color temperatures, such as warm, neutral, or cool white, at any time.
Why is my new LED panel buzzing?
A buzzing sound often points to an incompatible dimmer switch. An installer must use a dimmer specifically rated for LED fixtures. Loose wire connections can also cause humming. The installer should turn off the power and re-check all wiring for a secure fit.
What is the easiest way to dispose of the old fixture?
An installer should take the old fluorescent tubes to a designated recycling center. Many large hardware stores offer free take-back programs. The metal housing can be taken to a local scrap metal recycler. This ensures all components are handled responsibly.
See Also
Replacing Your Ceiling Light Fixture: A Step-by-Step Installation Guide
Understanding LED Panel Lights: Their Functionality and Operation Explained
Top 10 LED Slim Panel Lights for Effortless Installation in 2026