


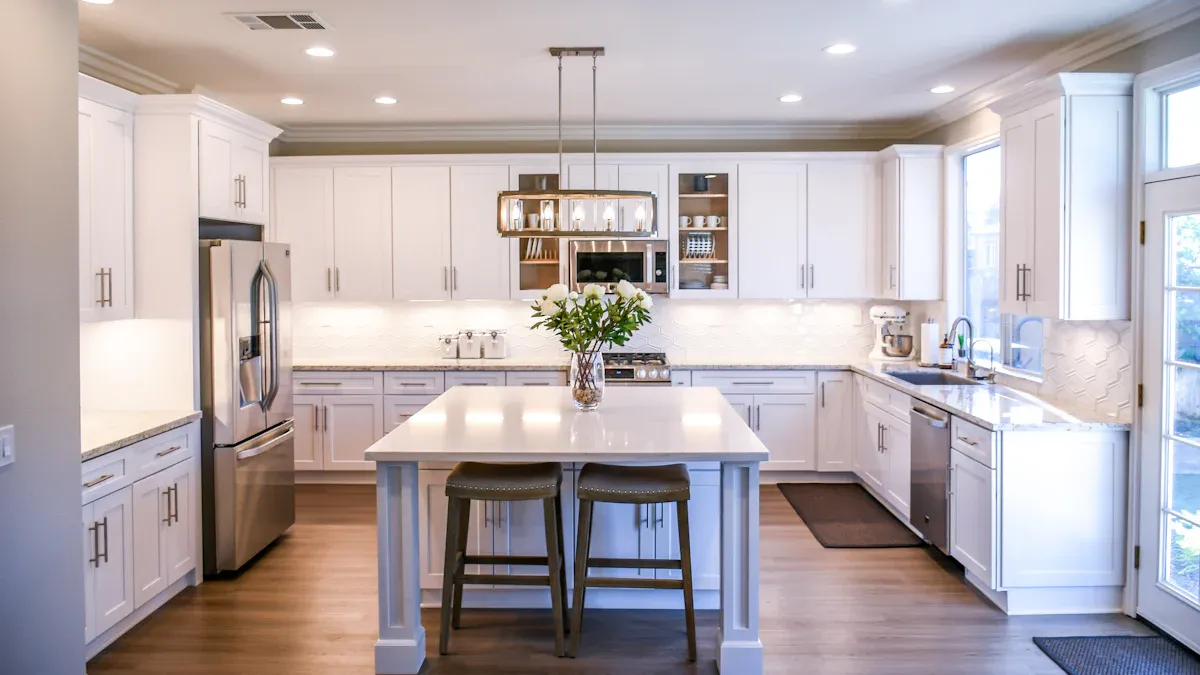
Effective downlighting depends on correct spacing relative to ceiling height. A well-planned layout transforms a room's function and feel. The process of installing LED downlights is a major trend, with consumers choosing from various led light fixtures offered by every major LED DownLight Manufacturer. The global demand, driven by new construction and retrofits, is reflected in the market's substantial growth.
Country | Share (%) | Valuation (USD Million) in 2025 | CAGR (%) |
|---|---|---|---|
United States | 22 | 2,458.00 | 10.4 |
China | 20 | 2,234.44 | 10.5 |
India | 15 | 1,675.83 | 10.6 |
Competition among led light manufacturers is fierce, pushing innovation for each LED DownLight.
Master the Fundamentals of Downlight Spacing
Proper spacing is the single most important factor for a successful downlight installation. It dictates whether a room feels evenly lit and welcoming or suffers from dark corners and uncomfortable glare. Incorrect placement is a common misstep. Homeowners often position lights too far apart, creating dim spots, or too close together, resulting in harsh, over-lit areas. A methodical approach to spacing prevents these issues and delivers a polished, professional result.
The Core Spacing Formula
A simple yet effective formula provides a starting point for any downlight layout. It ensures light distributes evenly across a space, forming a foundation for more advanced lighting designs.
The Ceiling Height Division Rule
A widely used guideline for general ambient lighting is to divide the ceiling height by two. The result gives a recommended spacing distance in feet between each downlight. This rule helps maintain consistent illumination levels throughout the room.
Calculating for Standard 8-Foot Ceilings
Most homes feature standard 8-foot ceilings. Applying the division rule provides a clear calculation for these common spaces.
8 ft (Ceiling Height) ÷ 2 = 4 ft (Spacing Between Lights)
For a room with an 8-foot ceiling, installers should plan to space the downlights approximately 4 feet apart from each other.
Adjusting for Ceilings Under 8 Feet
Ceiling height significantly impacts downlight performance. In rooms with ceilings lower than 8 feet, such as basements, placing downlights too close together can make the space feel cramped and over-illuminated. Installers should consider increasing the spacing slightly beyond the formula's result to create a more open and comfortable feel.
Adapting for Ceilings Over 10 Feet
High or vaulted ceilings require a different strategy. Spacing downlights too far apart in these areas will result in insufficient illumination at floor level. While the division rule still applies, lighting designers often use a more detailed formula for precision.
Professional Tip: A common industry formula states that the spacing (d) between two lights can be up to 1.5 times the height (h) of the fixture above the primary work surface (e.g., a 30-inch-high countertop). This method provides excellent coverage for taller spaces.
Wall and Obstruction Clearance
A successful layout accounts for more than just the space between lights. It also requires careful planning around walls, structural elements, and other ceiling fixtures to maximize light effectiveness and avoid visual disruptions.
The 2-Foot Rule for Wall Distance
Installers should position downlights at least 2 to 3 feet away from walls. This practice prevents casting distracting shadows down the wall surface and avoids wasting light on the upper edges of the room. A good practice is to make the distance from the wall half of the distance between the fixtures.
Example: If downlights are 4 feet apart, they should be 2 feet from the wall.
Planning Around Ceiling Joists
Ceiling joists are the unseen obstacles of any downlight project. Before drilling any holes, it is critical to use a stud finder to locate the joists. The layout may need slight adjustments to ensure each downlight housing fits cleanly between them.
Working Around Ceiling Fans and Vents
Ceiling fans and HVAC vents require special consideration. Placing a downlight within the spinning diameter of fan blades will create an annoying strobe or flickering effect. Always position fixtures outside the path of the blades to ensure smooth, consistent light.
Clearing Tall Furniture and Cabinetry
Map out the location of tall furniture like bookcases, entertainment centers, or armoires. Placing a downlight directly above these items will cast large, unusable shadows on the floor. Adjust the grid to illuminate the floor space in front of them instead.
Creating an Even Light Grid
The goal of ambient lighting is to create a uniform, shadow-free environment. A symmetrical grid is the most effective way to achieve this, making a room feel balanced and visually pleasing.
How to Map Your Ceiling Layout
Measure the room's length and width.
Determine your ideal spacing based on ceiling height.
Mark the location for the first downlight, observing the wall clearance rule.
Use a measuring tape and chalk line to map out the rest of the grid, ensuring equal distances between all fixtures.
Achieving Uniform Ambient Light
A well-planned grid ensures even light distribution and minimizes dark spots, which helps create an inviting atmosphere. Finding the right balance is essential.
A layout that is too sparse leads to uneven lighting.
A layout that is too dense causes glare and visual discomfort.
Achieving this balance is key to a functional and aesthetically pleasing lighting environment.
Avoiding the "Airport Runway" Effect
Lining up downlights in a single, straight row down the center of a room or hallway creates a harsh, uninviting "runway" look. Instead, installers should use a grid pattern with multiple rows. This approach spreads light more evenly and integrates better with human movement, ensuring a person's eyes remain comfortable while the space stays effectively illuminated.
Key Considerations Before Installing LED Downlights
Beyond spacing, the technical specifications of the downlights themselves play a crucial role in the final outcome. Selecting the right brightness, beam angle, and color temperature is essential for creating a functional and atmospheric space. Making informed choices before installing LED downlights prevents common issues like insufficient light or an uncomfortable ambiance.
Choosing the Right Lumens for Brightness
Lumens (lm) measure the total amount of visible light from a source; more lumens mean a brighter light. The required brightness depends heavily on ceiling height and the room's function.
Lumens for Low Ceilings (Under 8 ft)
In spaces with low ceilings, such as basements, lower lumen outputs are often sufficient. Using overly bright lights can make the room feel small and cause glare. A range of 400-600 lumens per fixture typically provides comfortable ambient light without overwhelming the space.
Lumens for Standard Ceilings (8-10 ft)
For standard ceiling heights, a general-purpose downlight usually falls between 600 and 900 lumens. This range is versatile enough for ambient lighting in living rooms and bedrooms. Task-oriented areas like kitchens may require higher brightness levels.
Lumens for High Ceilings (Over 10 ft)
High ceilings demand more powerful fixtures to push light down to the living area effectively. Downlights with 1000 lumens or more are necessary to prevent the space from feeling dim. The following table provides a professional guide to target light levels, measured in lux (lumens per square meter).
Room/Area | Lighting Type | Recommended Lux (Lm/m²) |
|---|---|---|
Living Room | General (Ambient) | 50-150 |
Kitchen | Working Areas (Task) | At least 400 |
Bedroom | General (Ambient) | 50-150 |
Bathroom | General (Ambient) | 150-300 |
Home Office | Task Lighting | 400-500 |
Selecting the Correct Beam Angle
The beam angle determines how wide or narrow the cone of light is. This specification directly impacts the trade-off between light coverage and intensity.
Wide Beams (60°+) for General Lighting
A wide beam angle spreads light over a larger area, creating soft, diffuse illumination. This is ideal for general ambient lighting, as it minimizes shadows and provides even coverage. A 120° beam is excellent for overall room lighting.
Medium Beams (35°-45°) for Task Areas
Medium beams offer a balance of intensity and coverage. They are perfect for task lighting over kitchen countertops, desks, or reading areas, focusing bright light exactly where it is needed without significant light spill.
Narrow Beams (10°-25°) for Accent Lighting
A narrow beam creates a concentrated, high-intensity pool of light. This effect is used for accent lighting to create drama and draw attention to specific features.
Artwork/Displays: A very narrow beam (15°-25°) makes art pop.
Architectural Details: It can highlight columns or textured walls.
Focal Points: It draws the eye to a specific object in a room.
Understanding Color Temperature (Kelvin)
Color temperature, measured in Kelvin (K), describes the appearance of light, from warm yellow to cool blue. This choice dramatically influences a room's mood.
Professional Tip: 💡 Human-centric lighting systems use changing Kelvin temperatures throughout the day—cool light in the morning to boost alertness and warm light at night to promote relaxation.
Warm White (2700K-3000K) for Cozy Spaces
This warm, yellowish light creates a cozy and inviting atmosphere. It is the standard choice for residential spaces where relaxation is key, such as living rooms, dining areas, and bedrooms.
Neutral/Cool White (3500K-4000K) for Kitchens
This balanced white light renders colors accurately and enhances clarity without feeling too harsh. A 4000K temperature is a popular choice for kitchens, bathrooms, and home offices where tasks require good visibility.
Daylight (5000K+) for Garages and Workspaces
Mimicking natural daylight, this crisp, blue-toned light improves focus and visibility for detailed tasks. It is best suited for functional areas like garages, workshops, and commercial settings where maximum clarity is essential.
The Importance of Dimmability
Dimmability transforms lighting from a simple utility into a dynamic design element. It provides the flexibility to adjust light intensity, adapting a room's atmosphere to any occasion. This control is a critical component for a truly professional lighting installation.
Why Dimmers Are Essential for Ambiance
Dimmers are the key to unlocking a room's full potential. A single lighting layout can serve multiple functions throughout the day. Bright light is perfect for cleaning or focused tasks, while low light creates a relaxed, intimate setting for evenings. This ability to tailor brightness allows homeowners to craft the perfect mood for any activity, from a lively dinner party to a quiet movie night.
💡 Design Tip: A lighting system with dimmers offers layers of control. It allows a space to transition seamlessly from a functional work area to a comfortable living space with the simple turn of a dial or tap of a screen.
Choosing Compatible LED Dimmer Switches
LED technology requires specific dimmer switches for smooth performance. Using an old dimmer designed for incandescent bulbs with new LEDs often leads to problems. Homeowners must ensure the LED downlights and the dimmer switch are explicitly listed as compatible with each other. Mismatched components can cause a range of frustrating issues.
Common problems arising from incompatibility include:
Flickering or Strobing: The lights pulse or flash rhythmically.
Ghosting: A faint glow remains even when the lights are turned off.
Drop out: The light suddenly turns off before reaching the lowest dim setting.
Pop on: The light jumps to a bright level instead of turning on smoothly.
Dead travel: The dimmer control has no effect on the light level in certain ranges.
These issues often stem from using non-dimmable LEDs, incompatible dimming controls, or low-quality fixtures. Verifying compatibility before installing LED downlights is essential for reliable operation.
Integrating with Smart Home Systems
Smart dimmers elevate lighting control to a new level of convenience and automation. These devices connect to a home's Wi-Fi network, enabling control via smartphone apps or voice assistants like Amazon Alexa and Google Assistant. This integration offers advanced functionality beyond manual adjustment. Users can schedule lights to turn on, off, or dim at specific times. They can also create custom lighting "scenes" that adjust multiple lights to preset levels with a single command. Planning for smart controls when installing LED downlights provides the ultimate modern lighting experience.
Room-by-Room Downlight Installation Strategies
A successful lighting plan requires more than just a general formula; it demands a tailored approach for each room. The function of a living room is vastly different from that of a kitchen, and a bedroom's lighting should prioritize restfulness. Applying room-specific strategies ensures the final layout is both beautiful and highly practical.
The Living Room Layout
The living room is a versatile space used for relaxing, entertaining, and family activities. Its lighting design should be equally flexible, incorporating layers to accommodate different moods and functions. A layered approach combines ambient, task, and accent lighting for a complete solution.
Ambient: This is the foundational layer, providing general, even illumination. Recessed downlights are a common choice for this purpose.
Task: This layer delivers focused light for specific activities like reading. Floor lamps or adjustable downlights work well here.
Accent: This final layer creates visual interest by highlighting artwork or architectural details.
General Ambient Lighting Grid
For general illumination, designers often move away from rigid grid patterns. A strict grid can make a living room feel cold or create unflattering shadows. A more sophisticated approach uses downlights to "wash" walls with light or brighten key walkways. This technique makes the room feel larger and more inviting. For a standard 15x20 foot living room, a total of approximately 6,000 lumens provides comfortable ambient light. All ambient fixtures should connect to dimmers to allow for easy mood adjustments, from lively to relaxed.
Accent Lighting for Artwork and Features
Accent lighting turns walls and objects into focal points. Adjustable gimbal downlights are perfect for this role. Installers can direct their narrow beams to highlight a piece of art, a textured fireplace, or an architectural feature. Using dimmable fixtures, such as Blossom Down Lights, allows for precise control over the intensity, creating dramatic effects without causing glare. This targeted illumination adds depth and a professional touch to the room's design.
Task Lighting for Reading Nooks
Dedicated reading nooks or seating areas require focused light to prevent eye strain. While a floor lamp is a classic solution, an adjustable downlight offers a clean, modern alternative. Fixtures like Cyclone Down Lights can be aimed directly at the reading material, providing bright, clear illumination exactly where it is needed. Placing this light on a separate switch gives the user control without affecting the room's overall ambient lighting.
The Kitchen Lighting Plan
The kitchen is a workhorse space where visibility and safety are paramount. A successful kitchen lighting plan layers multiple light sources to eliminate shadows on work surfaces and ensure every corner is well-lit. Functionality should always guide the layout, even if it means deviating from a perfectly symmetrical ceiling grid.
Task Lighting Over Countertops
Task lighting is the most critical layer in the kitchen. To illuminate countertops effectively, installers should position downlights directly over the edge of the counter, not behind it. Placing lights behind the workspace causes the person's body to cast a shadow directly onto their task area. Using multiple smaller 2-3 inch downlights instead of fewer large ones provides more even coverage and minimizes shadowing.
Illuminating the Kitchen Island
The kitchen island is a central hub for food prep, dining, and socializing. It requires ample, direct light.
Design Tip: Position a row of downlights slightly in front of the island's work surface, not directly overhead. This placement prevents a person's head from blocking the light. Consider the fixture's beam angle to ensure the entire surface receives full coverage. While pendant lights are a popular choice, a clean row of recessed downlights offers a minimalist and highly effective alternative.
Ambient Lighting for Walkways
Once task areas are covered, ambient lighting fills in the gaps. A grid of fixed, wide-beam downlights provides safe and even illumination for walkways and general floor space. This ensures there are no dark spots as people move through the kitchen. These lights should be on a separate circuit from the task lights to allow for independent control.
Dedicated Sink and Pantry Lighting
Often overlooked, the sink and pantry are key work zones that need their own dedicated lighting. A single waterproof downlight centered over the sink illuminates washing tasks. Inside a pantry, a surface-mounted or recessed downlight activated by a door jamb switch provides instant visibility, making it easy to find ingredients quickly.
The Bedroom Lighting Strategy
A bedroom should be a sanctuary for rest and relaxation. The lighting design must support this purpose, creating a calm and comfortable atmosphere. The key is to provide soft, indirect light and avoid harsh, stimulating glare.
Perimeter Lighting for a Relaxing Glow
Instead of a central fixture, a perimeter lighting layout creates a much softer and more relaxing environment. By placing downlights approximately half a meter (about 1.5 to 2 feet) from the walls, the light gently washes down the vertical surfaces. This technique makes the room feel larger and brighter without shining light directly into a person's eyes. Using warm white bulbs (around 3000K) enhances this cozy, inviting effect.
Why to Avoid Lights Directly Over the Bed
Placing downlights directly over the bed is a common design mistake with significant negative consequences. Lying in bed and staring up into a bright light source is uncomfortable and disruptive. More importantly, exposure to artificial light at night, especially blue light, can interfere with the body's natural sleep-wake cycles.
This disruption can block the production of melatonin, the hormone that regulates sleep. Studies have shown this interference can lead to:
Poorer sleep quality and difficulty reaching deep sleep stages.
Increased risk of psychological distress, including anxiety and depression.
Long-term health risks, including metabolic disorders and a weakened immune system.
For these reasons, lighting designers strongly advise against installing any fixtures directly above the head of the bed.
Functional Wardrobe and Closet Lighting
Good closet lighting is a functional necessity. An adjustable downlight positioned just outside the closet and aimed inward is an excellent solution. It illuminates the contents without requiring complex wiring inside the closet itself. For walk-in wardrobes, a series of small downlights provides comprehensive coverage, ensuring every shelf and hanging rod is clearly visible.
The Bathroom Lighting Guide
A bathroom's lighting design must prioritize safety and functionality. Due to high moisture levels, specific building codes and fixture ratings are non-negotiable. A layered approach ensures that grooming tasks are well-lit, wet areas are safely illuminated, and the overall space is bright and welcoming.
Task Lighting Around the Vanity Mirror
The vanity is the primary task zone in a bathroom, used for grooming, shaving, and applying makeup. The goal is to provide bright, even light that eliminates shadows on the face.
Professional Tip: 💡 The most effective vanity lighting comes from the sides, not from directly overhead. A single downlight above the mirror casts harsh shadows under the eyes, nose, and chin.
A superior solution involves placing two small, adjustable downlights on either side of the mirror, positioned to create cross-illumination. This technique provides shadow-free light. If a ceiling-mounted approach is the only option, installers should use a pair of downlights positioned over the edges of the countertop, slightly in front of where a person would stand. This placement helps minimize shadows cast by the person's head and body.
Shower and Bathtub Illumination
Lighting wet areas like showers and bathtubs is critical for safety, but it requires strict adherence to electrical codes. All fixtures installed in these zones must have the correct rating to prevent electrical shock and moisture damage.
The National Electrical Code (NEC) mandates specific protections for bathroom electrical systems.
Wet or Damp Location Rating: Fixtures must be officially rated for wet or damp locations. This ensures their construction prevents moisture from reaching internal electrical components.
GFCI Protection: All bathroom circuits, including those for lighting, must have Ground Fault Circuit Interrupter (GFCI) protection. This device quickly shuts off power if it detects a fault, preventing severe electric shock.
IC-Rating for Insulation Contact: If recessed lights touch ceiling insulation, they must be IC-rated (Insulation Contact). This rating confirms the fixture is designed to manage heat safely and prevent a fire hazard.
A single, wet-rated downlight centered over the shower or tub provides ample, safe illumination. The fixture's IP (Ingress Protection) rating is a key indicator of its water resistance.
Zone | Description | Voltage | Minimum IP Rating | Recommended IP Rating |
|---|---|---|---|---|
0 | Inside bath or shower | Low voltage (max 12V) | IP67 (immersion-proof) | N/A |
1 | Above bath/shower (up to 2.25m) | N/A | IP44 | IP65 |
2 | 0.6m outside bath perimeter (up to 2.25m) | N/A | IP44 | N/A |
Outside Zones | Beyond Zones 0, 1, 2 | N/A | IP20 (advisable) | N/A |
⚠️ Safety First: Always hire a qualified electrician for bathroom installations. They ensure all work complies with local electrical codes and safety standards.
General Room Lighting for Safety
Once task and wet zones are addressed, general ambient lighting ensures the rest of the bathroom is safe and easy to navigate. A central, wide-beam downlight can provide sufficient illumination for smaller bathrooms. In larger spaces, a small grid of two to four downlights creates even, shadow-free coverage.
For separate water closets, a single downlight provides necessary light. Installers should position the fixture approximately 2 feet from the back wall. The beam angle should be considered to ensure the light washes the wall appropriately without creating glare. This strategic placement provides comfortable and effective illumination for the small space.
Selecting the Right Downlight Hardware
Choosing the right hardware is as important as planning the layout. The fixture's components determine its function, installation method, and final appearance. Understanding these options ensures the selected hardware meets the specific needs of each room.
Fixed vs. Adjustable (Gimbal) Downlights
Downlights come in two primary styles: fixed and adjustable. Each serves a distinct purpose in a lighting plan.
When to Use Standard Fixed Downlights
Fixed downlights cast light straight down. They are the standard choice for general ambient lighting. Installers use them to create an even grid that provides uniform, widespread illumination across a room. Their straightforward design makes them ideal for hallways, walkways, and any area needing consistent, non-directional light.
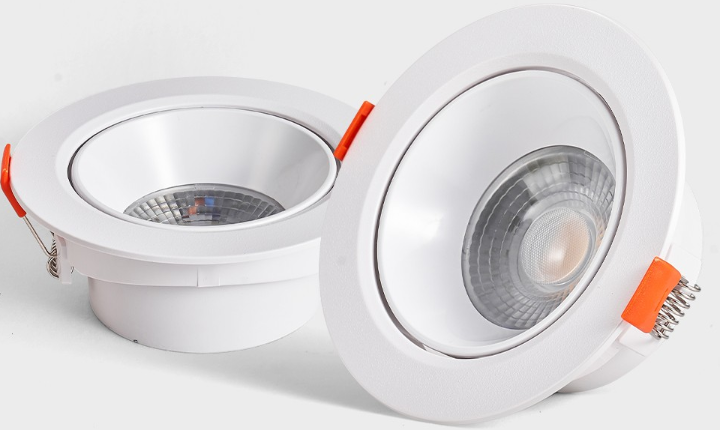
The Versatility of Adjustable Gimbal Lights
Adjustable, or gimbal, downlights offer superior flexibility. Their internal housing pivots, allowing installers to direct the light beam precisely. This adaptability makes them an invaluable tool for layered lighting designs.
Sloped Ceilings: Gimbal lights are essential for vaulted or sloped ceilings. They can aim light straight down, preventing the uneven bright spots and dim zones that fixed lights would create.
Accenting Features: They provide powerful control for highlighting artwork, accenting bookshelves, or illuminating architectural details, creating instant focal points.
Targeted Task Lighting: In kitchens, they deliver bright, focused light over countertops and islands without the visual clutter of pendant fixtures.
Understanding Housing and Trim Types
The housing is the main part of the fixture installed inside the ceiling, while the trim is the visible portion. Both come in various types to suit different installation scenarios and aesthetic goals.
New Construction vs. Remodel Housings
The choice between new construction and remodel housings depends entirely on ceiling access.
Feature | New Construction Housings | Remodel Housings |
|---|---|---|
Ceiling State | Drywall not yet in place; open access to joists | Existing ceiling with drywall; limited access |
Mounting Method | Fasten directly to ceiling joists with sturdy metal arms | Secure to existing drywall using adjustable clips or clamps |
Use Case | New builds, major additions, full ceiling replacement | Adding lights to existing rooms, replacing old units |
Installation Access | Requires open access to joists | Installed through a small hole cut in the drywall |
Baffle vs. Reflector Trim Styles
The trim style directly affects light quality and glare. Baffle and reflector trims offer different visual effects.
Feature | Baffle Trim | Reflector Trim |
|---|---|---|
Interior Design | Ribbed interiors | Polished surfaces |
Light Control | Absorbs light, softens glare, reduces eye strain | Amplifies brightness, directs light downwards |
Ideal Use | Living rooms, bedrooms, and walkways for comfort | Kitchens, high ceilings, and task areas for clarity |
Effect | Glare-free, comfortable, soft illumination | Enhanced functionality and maximized light output |
The Modern Trimless "Plaster-In" Look
For a minimalist aesthetic, trimless or "plaster-in" fixtures offer a seamless finish. The housing is installed and then plastered over, making the light source appear as if it is part of the ceiling itself. This creates a clean, high-end architectural look.
Special-Use Downlight Fixtures
Certain situations require specialized hardware to ensure safety and proper function.
IC-Rated for Insulated Ceilings
IC-rated (Insulation Contact) fixtures are mandatory when a downlight will be in direct contact with ceiling insulation. These housings are designed to manage heat safely, preventing a fire hazard.
Wet and Damp-Rated for Bathrooms
Fixtures installed in bathrooms, covered porches, or other high-moisture areas must have a wet or damp rating. This certification ensures they are sealed to protect electrical components from moisture damage and electrical shorts.
Shallow-Can for Tight Spaces
Shallow-can or "pancake" downlights are designed for ceilings with limited clearance. When obstructions like pipes, ducts, or shallow joists prevent the use of a standard-sized housing, these compact fixtures provide a viable solution.
Advanced Downlight Techniques and Layouts
Beyond basic grids, advanced techniques transform downlighting from a utility into a powerful design tool. These methods use light to shape perception, create atmosphere, and add architectural sophistication. Mastering them allows installers to craft truly dynamic and customized lighting environments.
The Wall Washing Technique
Wall washing is a technique that bathes a vertical surface in smooth, uniform light. It eliminates shadows and makes a room feel more spacious and brighter. This approach shifts the focus from the floor to the walls, creating an elegant and open ambiance.
Creating Visual Interest on Textured Walls
This technique is particularly effective on surfaces with texture. A gentle wash of light across exposed brick, stone, or wood paneling accentuates its unique character, adding depth and visual interest. Downlights can subtly define these areas, turning a simple wall into a deliberate design feature.
Spacing for an Even Wall Wash
Achieving a flawless wall wash depends on precise placement. The relationship between the fixture's distance from the wall and the spacing between fixtures is critical for even coverage.
Installers should place downlights approximately 6 to 12 inches from the wall.
The spacing between each downlight should match its distance from the wall to ensure uniform illumination.
This precise arrangement creates a seamless sheet of light down the wall surface.
Scalloping Effect
The scalloping effect occurs when the light from a downlight creates a distinct arc-shaped pattern on an adjacent wall. While sometimes an accident of poor placement, designers can use it intentionally to create rhythm and drama.
What is Scalloping and How to Use It
Scalloping creates a series of repeating light arcs on a wall. Installers produce this effect by increasing the distance between fixtures relative to their distance from the wall. A good starting point is to space the downlights twice as far apart as their setback from the wall.
For example, if downlights are 2 feet from the wall, spacing them 4 feet apart will create noticeable scallops.
Creating Dramatic Light Arcs
In hallways and corridors, intentional scalloping adds architectural interest without being overpowering. The delicate, repeating patterns guide the eye and create a welcoming atmosphere. Fixtures with scalloped shades can diffuse light beautifully, enhancing this elegant effect and making a narrow space feel more fashionable and eye-catching.
Lighting Open-Concept Spaces
Lighting an open-concept area presents a unique challenge. The goal is to define distinct functional zones—like a kitchen, dining area, and living room—without physical walls, while maintaining a cohesive overall design.
Creating Cohesive Zones with Light
Recessed downlights are the workhorse for open-concept spaces. They provide broad, even ambient light without adding visual clutter. Installers can use them to define zones by grouping them over specific areas. When paired with dimmer switches, these fixtures offer incredible flexibility, allowing a space to shift from bright and functional to soft and moody.
Unifying Adjacent Rooms
A layered lighting strategy is key to creating a unified flow between adjacent rooms. This approach ensures both practicality and comfort.
Ambient Lighting: Provides the base layer of general illumination.
Task Lighting: Delivers focused light for activities like cooking or reading.
Accent Lighting: Highlights features to add character and drama.
Using fixtures with consistent styles and finishes, such as matte black, ensures visual cohesion across the different zones. This creates a fluid and charming environment that feels connected.
Wiring for Dual Control
Advanced lighting control elevates a layout from basic to sophisticated. Dual control, or zoning, involves wiring different groups of lights to separate switches. This strategy provides homeowners with maximum flexibility. It allows them to tailor a room's atmosphere instantly. A well-planned wiring scheme is the foundation of a dynamic and user-friendly lighting system. It empowers users to adjust illumination for any task or mood.
Separating Lights into Different Circuits
Separating lights into different circuits is essential for layered lighting design. Installers should group fixtures based on their function. This allows for independent control over each lighting layer.
Ambient Lights: The main grid of downlights for general illumination goes on one circuit.
Task Lights: Fixtures over countertops or reading nooks connect to a second circuit.
Accent Lights: Gimbal lights highlighting artwork or features operate on a third circuit.
This separation gives homeowners precise control. They can turn on only the task lights for food preparation. They can use just the accent lights to create a dramatic evening mood. This approach enhances functionality and saves energy by only using the lights that are needed.
Planning Your Switch Locations
The placement of light switches is critical for convenience and accessibility. Thoughtful planning ensures switches are intuitive to find and easy to use. Installers should consider the flow of traffic through a room. Switches need to be located at logical entry and exit points.
💡 Professional Tip: Finalize all switch locations during the initial layout phase. Marking their positions before any wiring begins prevents costly changes and ensures an ergonomic final result.
Ergonomic best practices ensure usability for everyone. Adhering to established standards creates a comfortable and compliant environment.
Installers should mount switches between 42 and 48 inches above the finished floor. This height accommodates most users and aligns with national standards.
For wheelchair accessibility, switches must be within a reach range of 15 to 48 inches from the floor.
ADA guidelines require switches that operate without tight grasping or twisting. Rocker-style switches are an excellent choice.
Consistency in switch height across a home helps users and simplifies installation.
Even in smart homes, physical switches at standard heights provide essential manual overrides.
Strategic switch placement is the final touch on a professional installation. It makes a sophisticated lighting system feel effortless to control.
A successful downlight installation hinges on three critical elements:
Precise spacing based on ceiling height
Room-specific layouts tailored to function
The selection of appropriate hardware
A thoughtful lighting plan elevates a home's design and improves its functionality. Homeowners can achieve a flawless, professional-looking result by first sketching a detailed layout. This initial step ensures every fixture contributes to a cohesive and effective lighting scheme.
FAQ
Can homeowners install LED downlights themselves?
While some experienced homeowners attempt DIY installation, hiring a qualified electrician is the safest option. Professionals ensure all work meets electrical codes. They also prevent common mistakes like improper wiring or poor placement, guaranteeing a safe and polished result.
How much does professional downlight installation cost?
Installation costs vary based on location, project complexity, and electrician rates. On average, homeowners can expect to pay between $75 and $150 per fixture. This price typically includes labor and basic materials but may not cover the cost of the downlight itself.
How long do LED downlights last?
LED downlights offer exceptional longevity. Most quality fixtures last between 25,000 and 50,000 hours. With average daily use, this translates to a lifespan of 15 to 25 years, significantly outlasting traditional incandescent or halogen bulbs.
Can you mix different color temperatures in one room?
Designers generally advise against mixing color temperatures within a single room for ambient lighting. This practice can create a visually jarring effect. However, using a different color temperature for a specific task light, like under-cabinet lighting, can be effective if done intentionally.
Why are my new LED downlights flickering?
Flickering often points to an incompatibility issue. The most common causes are:
Using a non-dimmable LED bulb with a dimmer switch.
Pairing the LED fixture with an older, incompatible dimmer switch.
Loose wiring connections.
Are LED downlights energy-efficient?
Yes, LED downlights are highly energy-efficient. They consume up to 80% less energy than traditional incandescent bulbs while producing the same amount of light. This efficiency leads to significant savings on electricity bills over the fixture's lifespan.
What is the difference between a downlight and a spotlight?
A downlight casts a wide cone of light downward for general illumination. A spotlight uses a narrow beam to highlight a specific object or feature. While some adjustable downlights can function as spotlights, their primary roles are distinct.