


Changing light fixtures is a common project, but this light fixture replacement involves serious electrical risks. Thousands of people are injured by home electrical hazards annually.
An estimated 70 electrocution fatalities are associated with consumer products each year.
Electrical malfunction is a leading cause of major residential fires.
To safely change a ceiling light fixture, a person must first turn off the power. To replace a ceiling light fixture, they disconnect the wires from the old unit. Then, they connect the wires for new hardware, like an LED Ceiling Light from an expert LED Ceiling Light Manufacturer. Many led light manufacturers now produce efficient led light fixtures.
Preparation: Tools and Safety First
A successful project begins with thorough preparation. Before starting any electrical work, a person must gather the correct tools and understand the essential safety procedures. This preparation prevents delays and, more importantly, protects against serious injury.
Gathering Your Tools and Materials
Having everything needed within arm's reach makes the installation process smoother and safer. A person avoids trips up and down a ladder by organizing tools and materials beforehand.
Essential Tools for the Job
The right tools are critical for a secure and professional-looking installation. Most of these items are common in a well-stocked DIY toolkit.
Voltage Tester: This is the most crucial safety tool. It confirms that no electrical current is flowing to the fixture.
Screwdrivers (Phillips and Flathead): These are necessary for removing the old fixture and installing the new mounting bracket.
Wire Strippers: They cleanly remove insulation from wires for a solid connection.
Needle-Nose Pliers: These are helpful for bending and twisting wires in tight spaces.
Ladder or Step Stool: A stable ladder provides safe access to the ceiling.
Flashlight or Headlamp: This illuminates the work area, especially after the power is turned off.
Safety Glasses and Dust Mask: These protect against debris falling from the ceiling.
Materials You Will Need
The new light fixture kit usually includes mounting hardware. However, it is wise to have a few extra items on hand.
Wire Nuts/Connectors: These secure wire connections. While the new fixture often includes them, having extras is a good idea.
Electrical Tape: This adds an extra layer of security around wire nut connections.
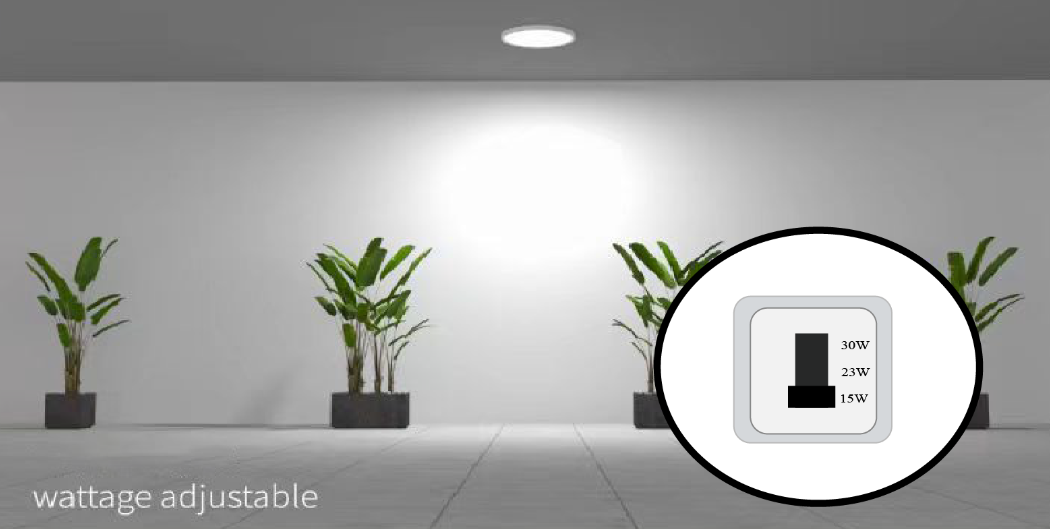
LED Light Bulbs: A person should ensure they have the correct type and wattage for the new fixture.
Key Safety Precautions
Working with electricity demands the utmost respect and caution. Following established safety protocols is not optional; it is a requirement for preventing accidents.
Understanding Your Circuit Breaker Panel
The circuit breaker panel is the home's electrical command center. Each breaker controls the flow of power to a specific area or circuit. Before starting, a person should locate this panel and identify the breaker connected to the light fixture. Most panels have a diagram, but it may be inaccurate or outdated.
Why a Voltage Tester is Non-Negotiable
A voltage tester is the only way to be certain a circuit is de-energized. Flipping a breaker is not enough. Complexities like back-feeding through transformers or unrecorded alternate circuits can leave wires unexpectedly live. One technician received a shock because a tester failed to detect voltage that was back-fed through a component. Even low voltages around 30 volts can cause a person to react dangerously, leading to falls or other injuries. According to NFPA 70E standards, workers must verify an electrically-safe work condition at the point of contact. A quality voltage tester is the non-negotiable tool for this critical verification step.
Step 1: Power Down and Remove the Old Fixture
The first physical step to change a ceiling light fixture involves de-energizing the circuit and taking down the existing unit. A person must complete this phase with precision to ensure a safe working environment for the electrical installation ahead.
Turning Off the Power
Before any tools touch the fixture, a person must completely shut off the power to the circuit. This is the most critical safety action in the entire project.
Locating the Correct Circuit Breaker
Identifying the correct breaker prevents accidental electrocution. If the home's electrical panel is not clearly labeled, a person can map it with a helper.
Turn on all the lights in the house.
One person stands at the breaker panel while a helper moves through the house.
Flip one breaker to the 'OFF' position. The person at the panel should hear a distinct click.
The helper identifies which light or room lost power.
Label that breaker with its corresponding room or area (e.g., "Living Room Ceiling").
Repeat this process for all breakers until the one controlling the target light fixture is found and switched off.
Once identified, a person must firmly push the correct breaker switch to the 'OFF' position to turn off power.
Verifying Power is Off with a Tester
Flipping a breaker is not enough. A person must confirm the absence of voltage at the fixture itself.
Safety Alert ⚡️: Always check for power with a non-contact voltage tester before touching any wires. Place the tip of the tester near each wire inside the fixture's canopy. The tester should not light up or make any sound. This step confirms the circuit is truly de-energized.
How to Remove the Old Ceiling Light Fixture
With the power safely off, a person can begin to remove the old light fixture. Working carefully prevents damage to the ceiling and wiring.
Removing Globes or Shades
Most fixtures have glass globes, shades, or decorative covers. A person should carefully remove these components first. They are often held in place by small thumbscrews or a retaining ring. Setting them aside prevents them from falling and breaking during the next steps.
Unscrewing the Fixture Canopy
The canopy is the base of the fixture that sits flush against the ceiling. To remove old light fixture canopies, a person typically unscrews a central decorative nut, called a finial, or a pair of mounting screws. Turning these counterclockwise will loosen the canopy.
Supporting the Fixture's Weight
A person must support the fixture's weight with one hand as it comes loose.
Never let the fixture hang by its electrical wires. The wires are not designed to bear weight and can snap or pull out of their connections.
A high step ladder can also help support the fixture's body during removal.
Gently lower the fixture a few inches from the ceiling. This action exposes the wiring and mounting bracket for the next step. This careful support is essential to safely remove the old light fixture.
Step 2: Disconnecting Wires and Old Hardware
With the old fixture hanging freely, a person can now focus on the electrical connections and hardware. This step involves carefully detaching the old wiring and removing the mounting bracket that holds the fixture to the ceiling. Proper execution here sets the stage for a smooth installation of the new light.
Detaching the Old Wiring
The fixture is connected to the home's wiring with three distinct wires. A person must identify and disconnect each one safely.
Identifying the Hot, Neutral, and Ground Wires
A person will see three sets of wires coming from the ceiling, connected to the fixture's wires. Standard color coding helps identify each wire's function.
Hot Wires: These wires carry the electrical current and are typically insulated in black or red.
Neutral Wires: These wires complete the circuit and are usually insulated in white.
Ground Wires: This safety wire is either bare copper or has green insulation.
Important Note: Wiring in older homes may not follow modern color standards. A person must always use a voltage tester on each wire before touching it. This final check confirms no current is present and prevents dangerous electrical errors.
Safely Unscrewing Wire Nuts
Wire nuts are small plastic caps that secure the wire connections. To disconnect the wires, a person should grip a wire nut and twist it counterclockwise. The nut will loosen and come off, exposing the twisted wires underneath. A person can then gently untwist the fixture wire from the ceiling wire. This process should be repeated for all three connections: hot, neutral, and ground.
Removing the Old Mounting Bracket
After disconnecting all wires, the old fixture is free and can be set aside. The final removal step is taking down the old mounting bracket.
Unscrewing the Bracket from the Electrical Box
The mounting bracket, or crossbar, is a metal plate screwed directly to the electrical box in the ceiling. A person uses a screwdriver to remove the two screws holding this bracket in place. They should keep these old screws handy, as they might be needed if the new fixture's hardware is incompatible. Once the screws are out, the old bracket comes off easily.
Inspecting the Ceiling Electrical Box
With the bracket removed, a person has a clear view of the ceiling box. Now is the time to check the electrical box for any signs of damage. A person should look for cracks, char marks, or loose connections. The box must be securely fastened to the ceiling joist. If it feels loose or shows damage, it must be repaired or replaced before proceeding.
Step 3: How to Install Ceiling Light Fixtures' New Bracket
With the old hardware removed, the next phase is to prepare and install the new mounting components. This step creates the foundation for a secure and properly aligned new ceiling light fixture. A person must handle this part of the electrical project with care to ensure a stable final result.
Preparing the New Mounting Hardware
Proper preparation of the new components simplifies the final installation. A person should organize all parts from the new fixture's box before climbing the ladder.
Unpacking Your New Fixture
A person should carefully unpack the new fixture and all its parts. They can lay everything out on a soft cloth to prevent scratches. This is the moment to prepare the new ceiling fixture for its assembly. The person should inspect each component for damage that may have occurred during shipping. They must also review the manufacturer's instructions, as they may contain model-specific details.
Identifying the New Bracket and Screws
Inside the box, a person will find a new mounting bracket, often called a crossbar or mounting strap. This metal piece attaches to the ceiling's electrical box. The hardware packet will also contain several screws. A person needs to identify the two shorter machine screws for the bracket and the two longer mounting screws that will hold the fixture's canopy. It is critical to install the mounting strap correctly for a safe fixture.
Installing the New Mounting Bracket
The new bracket provides the anchor point for the entire fixture. A person must attach it securely to the ceiling box to support the fixture's weight.
Securing the Bracket to the Electrical Box
To correctly install a ceiling light fixture, a person must firmly attach the bracket. This process involves several key actions.
Identify Compatibility. A person first examines the new bracket and the ceiling box. They must ensure the bracket's holes align with the threaded openings on the box.
Align Bracket. The person positions the bracket against the box. They align the screw holes for the correct orientation.
Secure Bracket. Using the provided machine screws, the person fastens the bracket tightly to the box. They should turn the screws until the bracket is snug.
Ensure Stability. The person gently tugs on the bracket to confirm it is stable. A loose bracket is a significant safety hazard and must be tightened before proceeding.
Adjusting the Mounting Screws for Your Fixture
The long mounting screws pass through the bracket and will hold the fixture's canopy. A person must adjust these screws to the correct depth.
Pro Tip 🛠️: A person can temporarily hold the new fixture's canopy up to the bracket. They should adjust the screws so they extend just enough for the decorative nuts to secure the canopy flush against the ceiling. This pre-fitting step is essential when people install ceiling light fixtures, as it prevents a gap between the canopy and the ceiling. Proper adjustment ensures a professional-looking installation.
Step 4: Wiring to Replace a Light Fixture
This step involves creating the new electrical connections. A person must perform this task with precision to ensure the new fixture operates safely and reliably. Correctly wiring is the most technical part of the project to replace a light fixture.
Understanding the Wire Connections
Before making any connections, a person must understand the role of each wire. Standard household wiring uses a color-coding system to identify each wire's function. However, a person should be aware of exceptions, especially in older homes or commercial settings.
The Black Wire (Hot)
The black wire is the "hot" or "live" wire. It carries the electrical current from the power source to the light fixture. A person must always handle this wire with extreme caution, even when the power is believed to be off.
The White Wire (Neutral)
The white wire is the "neutral" wire. Its function is to complete the electrical circuit by carrying the current back to the power source. While typically neutral, a person should know that exceptions exist.
A white wire marked with black or red electrical tape indicates it is being used as a hot wire, a common practice in switch loops.
The Ground Wire (Bare Copper or Green)
The ground wire is a critical safety feature. It provides a path for electrical current to travel to the earth in the event of a short circuit. This action trips the circuit breaker and prevents metal parts of the fixture from becoming energized.
Wiring Color Variations 🎨: While black, white, and green/copper are standard, a person might encounter other colors.
Blue and yellow wires can also be hot wires, often used as travelers in three-way switch setups.
Orange wires sometimes indicate a "high-leg" in a three-phase system, which is not typical for residential lighting.
Prior to the 2005 electrical code, green was not exclusively for grounding and could be an ungrounded conductor.
In industrial or commercial settings with higher voltages, the color code is different:
Wire Function
Color (277/480 Volts Industrial)
Phase 1
Brown
Phase 2
Orange
Phase 3
Yellow
Neutral
Gray
Ground
Green, Green/Yellow, or Bare
Connecting the New Fixture's Wires
With a clear understanding of the wires, a person can now make the new connections. The process involves matching the new fixture's wires to the corresponding wires in the ceiling electrical box.
Connecting Black to Black
A person takes the black wire from the new fixture and holds its stripped end next to the stripped end of the black wire from the ceiling. The ends should be even.
Connecting White to White
Next, a person repeats the process for the neutral wires. They align the stripped end of the fixture's white wire with the white wire from the ceiling. This step helps to connect the neutral and hot wires in the correct sequence.
Connecting the Ground Wires
Finally, a person must connect the ground wires. They join the fixture's ground wire (green or bare copper) to the ceiling's ground wire (green or bare copper). If the ceiling box is metal, it may also have a short green or bare "pigtail" wire that should be included in this connection.
Securing Connections with Wire Nuts
Properly securing the electrical connections is essential for safety. A person uses wire nuts to create a tight and insulated bond.
Strip Wires to Length. A person first ensures about 3/8 inch of bare wire is exposed on each wire end. They follow the manufacturer's guide for the specific wire nuts being used.
Pre-Twist the Wires. Using pliers, a person twists the bare copper ends of the matching wires together in a clockwise direction. This creates a strong mechanical bond independent of the wire nut.
Screw on the Wire Nut. A person places the wire nut over the twisted wires and turns it clockwise. They continue tightening until it is firm and snug. The plastic shell should completely cover all bare wire.
Perform a Pull Test. After tightening, a person gently tugs on each individual wire. A secure connection will not pull loose. If a wire comes out, the person must remove the nut and repeat the connection process.
Step 5: Mounting the New Fixture and Final Testing
With the wiring complete, the final stage involves physically mounting the new fixture and verifying that the installation is safe and functional. This step transforms the collection of wires and parts into a working and aesthetically pleasing addition to the room.
How to Mount the New Ceiling Light Fixture
Properly mounting the fixture ensures it is secure and sits flush against the ceiling. A person must handle the fixture's weight while carefully guiding it into place.
Tucking Wires Neatly into the Box
Before lifting the fixture, a person must carefully tuck all wires and wire nuts into the ceiling electrical box. This prevents pinched wires, which can cause short circuits or damage insulation.
A person gently folds the wires in an accordion style rather than stuffing them randomly.
They should avoid sharp bends that could damage the wire's insulation.
The person ensures all connections are pushed toward the back of the box, leaving clear space for the fixture base.
This process must adhere to box fill limits, as an overfilled box can lead to overheating. A person must ensure there is enough space for all conductors and connections.
Aligning the Canopy with Mounting Screws
A person now lifts the new fixture's canopy toward the ceiling. They must carefully align the holes in the canopy with the long mounting screws that extend down from the new bracket. It may take a moment to guide the screws through the openings. A person should support the fixture's weight with one hand while using the other to guide and mount the fixture base.
Securing the Fixture in Place
Once the screws are through the canopy, a person can secure the fixture. They take the decorative nuts or cap nuts that came with the fixture and thread them onto the ends of the mounting screws. A person tightens them by hand in a clockwise direction until the canopy is snug and flush against the ceiling. They should avoid over-tightening, which could dent or crack the canopy. A gentle push confirms the unit is stable and does not wobble. This completes the main effort to install the fixture.
Final Assembly and Testing
The final steps involve adding the bulbs and shades, restoring power, and testing the new light. This is the rewarding part of the project where a person sees the result of their work.
Installing Light Bulbs and Shades
A person now installs the light bulbs. They must ensure the bulbs are the correct type and do not exceed the maximum wattage specified by the fixture manufacturer. After installing the bulbs, they attach any glass globes, shades, or other decorative elements according to the product instructions.
Restoring Power at the Breaker
A person returns to the circuit breaker panel. With dry hands, they firmly flip the corresponding breaker switch back to the 'ON' position. A distinct click indicates the circuit is now live.
Safety First ⚡️: Before flipping the breaker, a person should ensure no one is touching the fixture and that the light switch in the room is in the 'OFF' position.
Testing Your New Light
With the power restored, it is time for the final test. This sequence confirms a successful and safe installation.
A person returns to the room and flips the light switch to the 'ON' position. The new fixture should illuminate.
If the light works, they should let it run for about 15 minutes.
After 15 minutes, they turn the light off. A person can then carefully check the fixture's base for any excessive heat. It may be warm, but it should not be too hot to touch.
They should listen for any unusual buzzing or humming sounds from the fixture, as this could indicate a loose connection.
Finally, a person gives the fixture one last gentle push to confirm it remains securely attached to the ceiling.
Troubleshooting: What If the Light Doesn't Work? If the fixture does not turn on, a person must turn the light switch off and shut off the power at the circuit breaker again before investigating.
Check the Bulb: A person should ensure the light bulb is new and screwed in securely. This is the most common reason for failure.
Inspect the Power Supply: A person must verify that the circuit breaker did not trip again immediately. If it did, a serious electrical issue exists that requires a professional.
Examine the Wiring: A person can re-check the wire connections. They must ensure each wire nut is tight and that the wires are matched correctly (black-to-black, white-to-white, ground-to-ground).
Test the Switch: The wall switch itself could be faulty. If other troubleshooting fails, the switch may need to be tested and replaced by a qualified electrician.
Assess the Fixture: In rare cases, the fixture itself may have an internal defect. A person can check for bent pins in the socket, but internal wiring problems require professional attention.
A successful test marks the completion of the project. A person has now learned how to change a ceiling light fixture safely and effectively.
A person can feel proud for successfully learning how to change a ceiling light fixture. They now understand the most critical safety rule and have avoided common mistakes like incorrect wiring or ignoring fixture weight.
Safety Recap ⚡️: A person must always turn off power at the breaker and verify with a voltage tester before touching any wires.
They can now enjoy the improved ambiance in their room. This project builds confidence for future DIY tasks, such as installing a dimmer switch or a smart fan. A person who can change a ceiling light fixture is well-prepared for new home improvement challenges.
FAQ
My ceiling wires are not black and white. What do I do?
A person should stop work immediately if wire colors do not match standard codes. This situation indicates non-standard or older wiring. They must use a multimeter to identify the hot wire. For safety, consulting a qualified electrician is the best course of action.
Can I reuse the old mounting bracket?
A person should always use the new bracket included with the fixture. The new hardware is designed specifically for the new light's weight and mounting system. Using the old bracket can lead to an unstable or improper installation.
What if the new fixture is very heavy?
Standard ceiling boxes support up to 50 pounds. For heavier fixtures, a person must install a fan-rated brace or box. These are anchored to ceiling joists and provide the necessary support to prevent the fixture from falling.
When should I call an electrician?
A person should hire an electrician if they find damaged wiring, a loose ceiling box, or non-standard wire colors. Any situation that makes them feel uncertain requires professional electrical expertise to ensure safety and compliance with local codes.
What if the ceiling box is plastic and has no ground wire?
A person connects the fixture's ground wire to the ceiling's ground wire. If no ground wire exists in a plastic box, they should cap the fixture's ground wire with a wire nut. The fixture will function, but without this important electrical safety feature.
Why is my new LED light flickering or buzzing?
Flickering or buzzing often points to an incompatibility with a dimmer switch. Many older dimmers are not designed for LED technology. A person should replace the switch with a modern, LED-compatible dimmer to resolve the issue.